
Project: Setting up a Valheim Server on Linux
Learning to work with Linux and setting up a Valheim server, all hosted on Azure

Editors Note: The pictures used are from a test run, that's why I felt comfortable leaving the IP address in the images, as this build has been decommissioned.
Welcome to my first project, I planning on doing a number of various different little hands on IT projects, to help me build a greater understanding of IT beyond my certifications. For my first project I wanted to learn more about Virtual Machines and running servers on them in Azure. To do this I choose to set-up a Valheim server running on a Linux VM, as I have just gotten into the game and felt that having a dedicated server would be a great benefit to me and my friends.
So the very first I needed to do was set up a ssh key pair for securely accessing my VM, I did this by opening up Cloud Shell in Azure and running the following command
ssh-keygen -m PEM -t rsa -b 4096
I then accessed the public key, via a cat view command
cat ~/.ssh/id_rsa.pub
Then I copied the result, which I would add later, during the creation of the VM.
I then created a virtual machine through the Azure portal, I chose a Standard B2s (2 vcpus, 4 GiB memory), as this is the recommended size for a Valheim server. I didn't create any additional discs as the storage that comes with the VM is more than enough to host the files needed.
Once it was deployed I accessed the VM via SSH, verifying with the key pair that I previously set-up. The first thing I did was create root access, this is necessary for completing a lot of tasks within the environment, and in our case it's needed to create a new user and edit some files.
sudo passwd root

Then I installed all of the dependences the server required to run.
sudo dpkg --add-architecture i386; sudo apt update; sudo apt install curl wget file tar bzip2 gzip unzip bsdmainutils python util-linux ca certificates binutils bc jq tmux netcat lib32gcc1 lib32stdc++6 libsdl2-2.0-0:i386 steamcmd
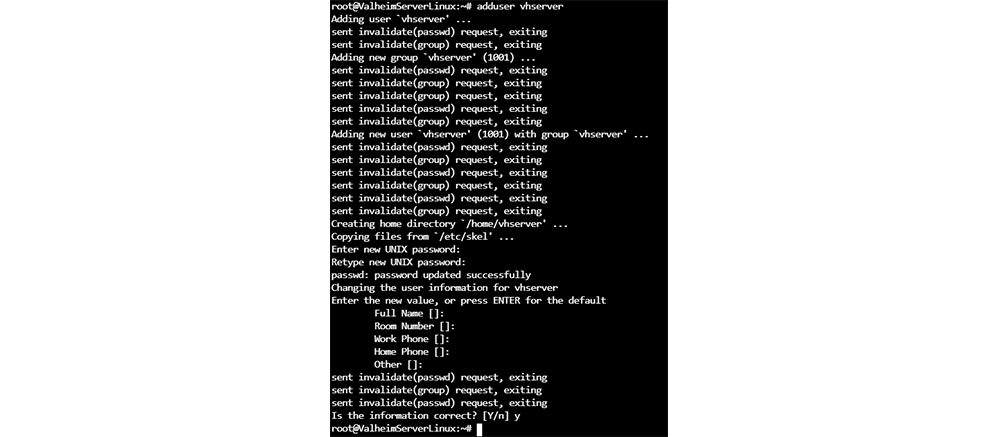
Once that was complete I created a new user for the server, with a simpler name for quicker use and access.
adduser vhserver
I then signed into that new user and downloaded the server manager, I went with LinuxGSM, as in my research before hand, I found that its a very popular platform with an active community, which is always useful when troubleshooting.
wget -O linuxgsm.sh https://linuxgsm.sh && chmod +x linuxgsm.sh && bash linuxgsm.sh vhserver
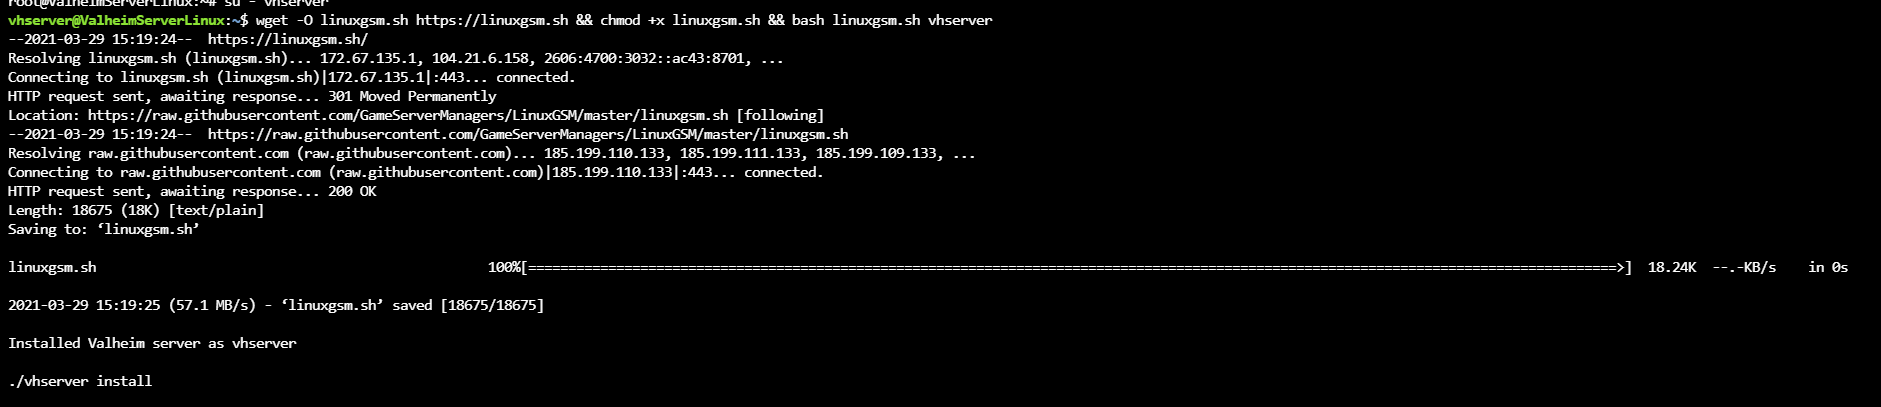
Once this was done I used it to install the Valheim server components
./vhserver install
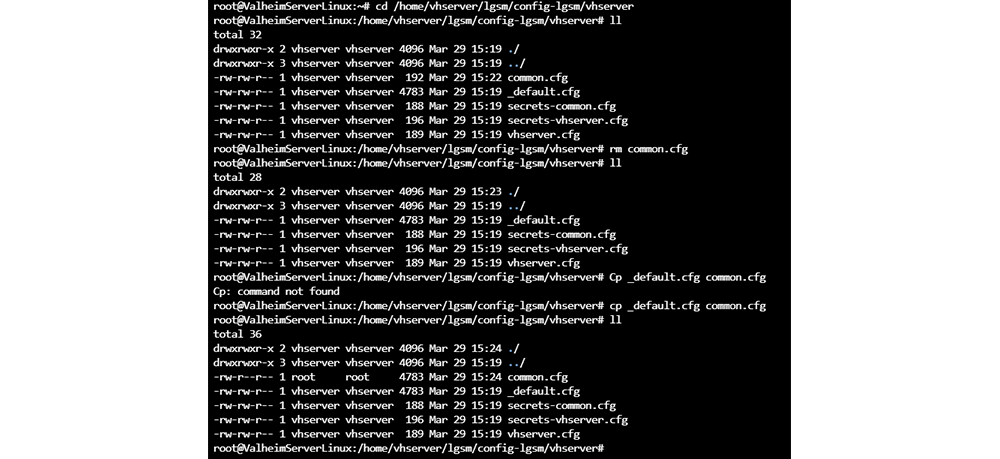
After the install I then had to configure the server before running it, this meant navigating to the config files
cd /home/vhserver/lgsm/config-lgsm/vhserver
I then removed the common.cfg file
rm common.cfg
and replaced it with a copy of the default.cfg
cp _default.cfg common.cfg
The reason I did this is because by default the common.cfg is an empty file, while _default.cfg has all the necessary parameters for us to easily edit as you'll see in a moment.
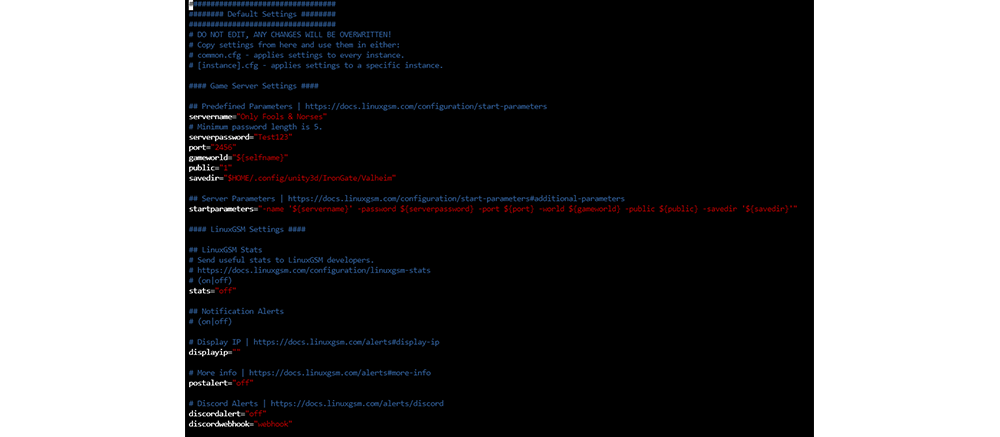
 Next I accessed the newly created common.cfg with the vim command
vim common.cfg
and proceeded to edit the servers name and add a password for better security.
I saved my changes and navigated back to the root and then booted up the server
./vhserver start

I then ran a quick check to see if the server was up and running.
./vhserver details
When I first tested this I was confused because I thought that my server was stuck on start-up as all of the documentation that I had seen had shown a "ONLINE" in the status field when the server was live. I initial couldn't find anything until I went searching on the official LinuxGSM Discord where I saw another user express the same issue, only to find that they recently changed the "ONLINE" status to simply read "STARTED" when the server is live.

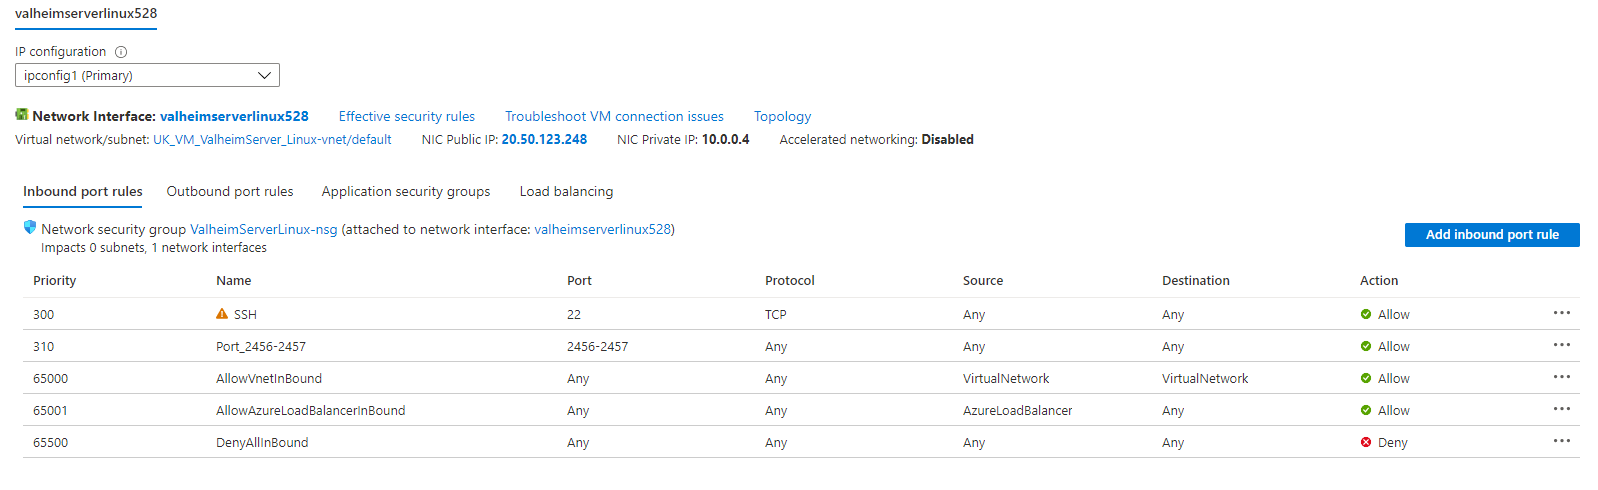
It was then time to jump back over to the Azure Portal to forward the required ports, so that the server could be accessed from outside its virtual network.
This is as simple as adding a new allow access inbound rule to the ports between 2456-2457.
After this I navigated to the IP settings for my VM and set the IP to Static, this means that the VM IP will stay the same between shutdowns. This is important for me as this is the way I’d be accessing the server.
 With all of this done my server was now up and accessible, and my friends and I would be able to play on it whenever we wanted.
I feel like I learned a decent amount from this project; such as how to create users in Linux, how to download files in Linux, and how to navigate and edit files. All of which are important first steps in building a greater understanding of Linux as a whole. Right now my plan is try and keep myself busy with various little IT centric projects, the next project I'm planning on doing is to learn a bit about Python.